|
 |
Multi Cut Saw
Kiln dried
wood is carefully selected and cut to exact tolerances. The process
begins with this multi-cut saw, capable of making up to six different
angle cuts per board, to endure accuracy and consistency. |
|
|
Truss
Machine
Royal
Homes builds its own trusses to ensure that our high pitched roofs and
vaulted custom ceilings are as accurately constructed as the rest of
the home. Here the proper configuration, mechanically held in position
and truss plated together by a hydraulic press.
|
 |
|
 |
|
|
|
 |
Floor
Framing
The framed
floor is placed in a jig and hydraulically squeezed to ensure it is
square. Tongue and groove 5/8" plywood is glued and power nailed in
place with coated nails. The heat generated by the driving force of
the nailer melts the coating to form a bond with the wood to increase
the holding strength and eliminate squeaky floors. |
|
|
|
|
|
|
Electrical
The floor
is raised to a convenient height to eliminate the problems of coping
with a ladder. Following a template on the floor, electricians drill
holes and string the electrical wires. This allows for a much neater
installation of Royal Homes' standard 200 amp. service. A service that
has the power to meet your needs, including future expansion. |
 |
|
|
|
|
|
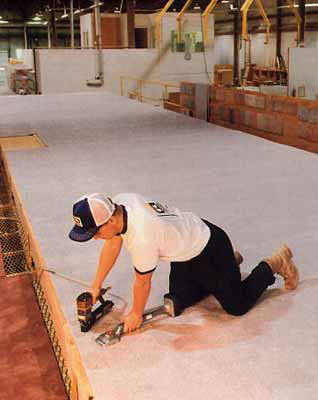 |
Floor Coverings
The floor coverings you choose are installed before
the walls are set in place, allowing for consistent stretching with no
bulges or poorly matched, oddly place seams. Underlay is glued in
place wherever vinyl is laid. Finally, two layers of plastic protect
the floor as it moves to the next work station. |
|
|
|
|
|
|
Ceiling
Rather than fight gravity, the ceiling are built
"upside down" so that gravity actually assists us. The installation of
a continuous vapour barrier eliminates the breaks at inside partition
walls commonly found in on-site construction. That means reduced heat
loss, then, for a superior finish, we cross strap the trusses, glue
and power screw the ceiling drywall in place to avoid future nail pops
or bulges.
|
 |
|
|
|
|
|
 |
Insulation
Walls are caulked and sealed at outside joints.
Because the walls have already been interior dry walled when put in
place, we can caulk and seal all electrical boxes, and then apply
insulation from the outside. An impossible task for the outdoor
builder, our insulating methods result in a superior, energy efficient
home. Exterior plywood sheathing, is glued and power fastened for
superior holding. |
|
|
|
|
|
|
Roofing
Because the roofing plywood is protected from the
elements and completely dry in our controlled building environment it
can be power nailed in position without rush or fear of damage. Then
your choice of coloured shingles, or other roofing material selected
from our wide range of samples, are installed. Many of our roofing
products come with a twenty year warranty or even longer.
|
 |
|
|
|
|
|
 |
Interior Finishing
Skilled drywallers, plasterers and painters work in
harmony to complete the interior of your home. Trim carpenters install
custom touches like French doors or crown moldings and complete the
kitchen area to exacting standards. From start to finish your Royal
Home is under the constant scrutiny of our quality assurance team and
subjected to over 247 control point inspections. |
|
|
|
|
|
|
Transport
Finally, ready for the big day, the modules of your
home are covered in a protective plastic membrane and placed on our
custom built "air-ride" flatbeds, specially designed from the safe
transportation of your new home. Drivers, employed by Royal Homes full
time, an advance crew and our site installation team accompany your
new home to its final destination.
|
 |
|
|
|